Key takeaways
- Traditional CHIRP sonar: Sends a range of frequencies and displays depth, bottom hardness, fish arches, and general water-column information. It is the most useful all-round mode and usually performs best at greater depth.
- Down imaging: Produces a narrower, more photographic-looking view directly below the boat. It helps identify branches, rocks, weed edges, and wreck-like objects, but the image represents a limited strip rather than the entire area around you.
- Side imaging: Scans to both sides and can cover much more water while the boat moves. It is excellent for locating isolated cover, but the best results require steady movement, suitable depth, and correct interpretation of the distance scale.
- High-frequency imaging: Frequencies around 800 kHz or higher can show finer detail in shallow water, while lower frequencies generally retain more useful range as depth increases. No single frequency is ideal for every situation.
The best fish finders for most anglers are a 7-inch GPS combo with CHIRP sonar and a transducer matched to your boat: choose Garmin STRIKER Vivid for simple value, Lowrance HOOK Reveal for chartplotter-style navigation, Humminbird HELIX 7 for mapping and imaging options, or Raymarine Element for a responsive touchscreen experience.
Our top picks

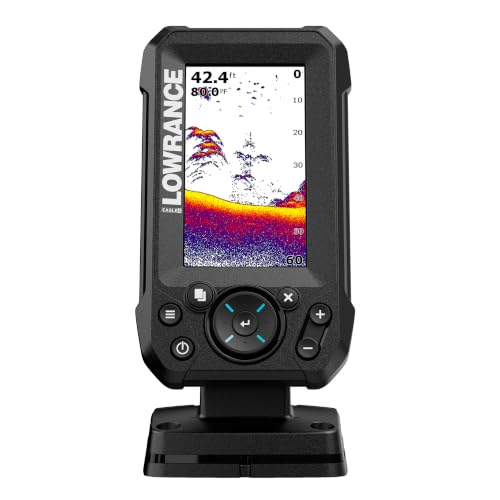


As an Amazon Associate we earn from qualifying purchases at no extra cost to you. Ratings are shown as listed on Amazon.
Quick comparison: best fish finders by use case
| Product | Display | Sonar and imaging | GPS and mapping | Best suited to | Typical market range |
|---|---|---|---|---|---|
| Garmin STRIKER Vivid 7cv | 7-inch color display, 800 × 480 pixels | CHIRP traditional sonar plus ClearVü; transducer-dependent | Built-in GPS; Quickdraw Contours mapping | Small boats, kayaks, and first-time buyers | About $350–$550 |
| Garmin STRIKER Vivid 9sv | 9-inch color display, 800 × 480 pixels | CHIRP, ClearVü, and SideVü with compatible transducer | Built-in GPS; user-created contour maps | Anglers who want side-looking coverage without a premium chart system | About $600–$900 |
| Lowrance HOOK Reveal 7 | 7-inch SolarMAX display | CHIRP, DownScan Imaging, and FishReveal on supported versions | GPS plotter; C-MAP-compatible charting varies by package | Navigation and fish separation in one affordable unit | About $450–$750 |
| Humminbird HELIX 7 CHIRP GPS G4N | 7-inch color display, 800 × 480 pixels | CHIRP and imaging depend on model and transducer | GPS, AutoChart Live, and map compatibility vary by package | Freshwater anglers who value detailed mapping and networking | About $550–$900 |
| Raymarine Element 7 HV | 7-inch high-contrast display, 800 × 480 pixels | High-frequency CHIRP, DownVision, SideVision, and RealBathy with suitable hardware | Built-in GNSS; compatible with detailed cartography | Users wanting fast touchscreen operation and broad imaging capability | About $700–$1,100 |
Prices are broad 2026 market ranges and change with transducer bundles, charts, and seasonal promotions. A display sold without the right transducer may look inexpensive but cost more after upgrading the hardware.
Which fish finder should you choose?
Best for a first fish finder: Garmin STRIKER Vivid 7cv
The STRIKER Vivid 7cv is a sensible starting point when you want clear depth readings, a basic GPS position, and bottom detail without learning a complex navigation system. Its 7-inch screen is large enough to split between sonar and GPS while remaining practical on a small console. ClearVü is useful for distinguishing structure, vegetation, and bottom contours beneath the boat, but it does not provide the same coverage as a side-imaging system.
Choose the 7sv version instead if scanning to either side of the boat matters. The “sv” configuration requires the appropriate SideVü-capable transducer, so compare the complete bundle rather than the display name alone.
Best for navigation and fish separation: Lowrance HOOK Reveal 7
The HOOK Reveal 7 is a strong choice when you want a more navigation-focused interface. FishReveal combines conventional sonar information with DownScan-style detail on supported configurations, helping you interpret fish arches alongside cover. It is particularly useful for anglers who regularly return to productive points, channels, or drop-offs and want GPS waypoints rather than only a live depth number.
Check whether the package includes the chart card and transducer you need. “Reveal” describes the display family, not every feature available in every bundle.
Best for mapping-focused freshwater fishing: Humminbird HELIX 7
A HELIX 7 makes sense for anglers who spend frequent days on lakes and want to build or use detailed contour information. AutoChart Live and compatible mapping tools can be more valuable than a larger screen when the main goal is finding ledges, humps, creek channels, and repeatable routes.
Humminbird model names are easy to confuse: CHIRP GPS, G4N networking, MEGA Imaging, and transducer bundles indicate different capabilities. Confirm the exact suffix before buying, especially if you need side imaging, networking, or a particular mapping card.
Best for a responsive premium interface: Raymarine Element 7 HV
The Element 7 HV is aimed at anglers who prefer a fast touchscreen workflow and want more advanced imaging options in a compact unit. Its high-frequency sonar modes can produce detailed views of structure, while GPS and chart support make it suitable for navigation as well as fish finding.
Touchscreens are convenient, but physical buttons can be easier to use with wet hands, gloves, spray, or a bouncing boat. If you fish rough water often, compare the control layout—not only resolution and imaging features.
Sonar types: what the extra imaging actually changes
- Traditional CHIRP sonar: Sends a range of frequencies and displays depth, bottom hardness, fish arches, and general water-column information. It is the most useful all-round mode and usually performs best at greater depth.
- Down imaging: Produces a narrower, more photographic-looking view directly below the boat. It helps identify branches, rocks, weed edges, and wreck-like objects, but the image represents a limited strip rather than the entire area around you.
- Side imaging: Scans to both sides and can cover much more water while the boat moves. It is excellent for locating isolated cover, but the best results require steady movement, suitable depth, and correct interpretation of the distance scale.
- High-frequency imaging: Frequencies around 800 kHz or higher can show finer detail in shallow water, while lower frequencies generally retain more useful range as depth increases. No single frequency is ideal for every situation.
Screen size, shallow water, and boat fit
A 5-inch unit can display depth and basic arches, but split-screen sonar and GPS become cramped. A 7-inch display is the practical middle ground for most kayaks, jon boats, and small consoles. A 9-inch screen improves map readability and side-imaging interpretation, although it needs more dashboard space and usually costs more.
For shallow water, prioritize a transducer that can maintain a clean bottom lock at low speed. A unit capable of deep-water performance is not automatically better in two or three feet of water. High-frequency DownScan or SideScan can reveal detail, but turbulence, weeds, aerated water, and a poorly positioned transducer may create more noise than fish information.
Measure the mounting area before ordering. A 7-inch display commonly needs roughly 8–10 inches of horizontal clearance once brackets and cable bends are included. Leave room behind the unit for power and transducer plugs, and avoid mounting where the screen is directly exposed to glare.
Transducer options and installation requirements
The transducer is as important as the display. A transom-mount model is usually the simplest option for an outboard boat: it attaches to the stern and can be adjusted vertically. A trolling-motor mount is convenient for anglers who want the sonar beam to point wherever the motor points, but cable protection and steering movement become important.
Through-hull and in-hull installations provide a cleaner permanent setup, but they require the correct hull material, angle, and installation method. A transducer designed for plastic or fiberglass may not work through a cored or metal hull. Read the manufacturer’s compatibility instructions before drilling.
Basic installation sequence
- Choose a location with smooth, relatively undisturbed water flow. Avoid areas directly beside chines, strakes, rivets, or the propeller’s turbulent wash.
- Mount the transducer so its sensing face remains underwater when the boat is moving, while still allowing trailering and launching without impact damage.
- Route the cable away from ignition wires, trolling-motor power leads, and sharp edges. Do not coil excess cable tightly around the transducer lead.
- Connect the display to a fused power supply sized according to the manual. A dedicated marine battery circuit helps reduce electrical noise.
- Test depth at idle before tightening every bracket. Then check the reading at increasing speeds; loss of bottom lock usually points to turbulence, mounting height, or trim rather than a defective screen.
Decision matrix for different buyers
| Your situation | Prioritize | Best direction | Why |
|---|---|---|---|
| Occasional angler with limited console space | 7-inch screen, simple CHIRP, GPS | STRIKER Vivid 7cv or similar 7-inch combo | Useful core data without a complicated installation |
| Regular lake fisherman searching large areas | Side imaging and detailed mapping | STRIKER Vivid 9sv, HELIX 7 imaging model, or equivalent | Faster scanning of banks, flats, and isolated cover |
| Kayak or portable setup | Low power draw, compact mount, protected cables | 5- or 7-inch unit with a portable battery box | Weight, waterproofing, and battery access matter more than maximum depth |
| Angler who follows waypoints and channels | GPS, charts, readable split screen | HOOK Reveal 7 or a mapping-oriented HELIX model | Navigation features provide value beyond finding fish |
| Frequent user upgrading from basic sonar | Networking, imaging, chart compatibility | Raymarine Element 7 HV or higher-tier 9-inch combo | More room to grow, provided the boat supports the installation |
Ownership costs and common mistakes
A useful way to compare value is cost per fishing day. A $600 unit used for 60 days over three years costs about $3.33 per day before installation, charts, and accessories. A cheaper $300 unit used only 15 times costs $20 per use. The better purchase is therefore the one whose features you will use, not necessarily the lowest shelf price.
The parts most likely to cause trouble are exposed cables, transducer brackets, fuse holders, connectors, and screens damaged by harsh cleaners. Rinse saltwater residue with fresh water, dry the connectors before sealing them, use a soft cloth on the display, and remove the unit when the boat is stored outdoors or transported. Do not power-wash the transducer or scrape growth from it with a metal tool.
Common buying mistakes include selecting a display first and discovering that the desired imaging requires a different transducer, mounting a transom transducer in propeller turbulence, and assuming a fish-shaped mark is automatically a catchable fish. Start with the water you fish, the space available, and the sonar view you can interpret consistently. For most buyers, that leads to a 7-inch CHIRP-and-GPS combo; move to side imaging or a 9-inch screen only when the extra coverage solves a real fishing problem.