Key takeaways
- Wide contact pads: Wider pads reduce pressure per square inch and are less likely to create dents than narrow plastic feet.
- Replaceable padding: Foam eventually compresses, splits, or becomes slick. Replaceable pads extend the life of the bar and reduce direct metal-to-trim contact.
- Rounded hooks: Rounded, padded hooks are less likely to gouge painted casing than sharp steel edges.
- Multiple support points: A bar that contacts the top and both sides of the opening generally distributes force better than a single narrow bracket.
- Positive locking hardware: Telescoping models should have a mechanical lock or safety pin in addition to friction. Friction alone is less reassuring for repeated use.
- Clear compatibility instructions: A trustworthy listing states opening width, trim requirements, surface restrictions, and capacity instead of publishing only a maximum weight.
The best doorway pull up bars that wont damage frames are pressure-free, over-the-door models with wide contact pads, rounded hooks, and a load rating comfortably above your body weight; for the lowest marking risk, choose a removable telescoping bar only when your doorway trim and wall structure are suitable.
A pull-up bar cannot be completely risk-free for every doorway. Paint, soft wood, loose trim, plaster, and drywall can all be damaged by concentrated force. The safest choice depends less on the brand name than on how the bar transfers your weight into the frame.
Our top picks


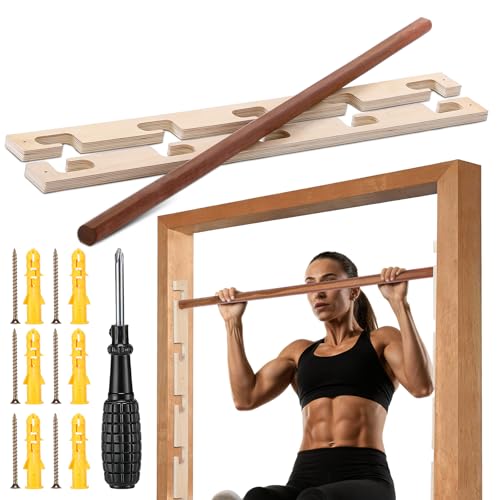
As an Amazon Associate we earn from qualifying purchases at no extra cost to you. Ratings are shown as listed on Amazon.
Best doorway pull-up bars by situation
| Best for | Recommended design | Typical width range | Typical rated capacity | Main frame concern |
|---|---|---|---|---|
| Renters and occasional users | Over-the-door bar with padded hooks | 24–36 in (61–91 cm) | 220–300 lb (100–136 kg) | Hook pressure on the top trim |
| Frequent pull-ups and chin-ups | Heavy-duty over-door multi-grip bar | 24–36 in (61–91 cm) | 250–400 lb (113–181 kg) | Repeated downward loading and worn padding |
| Minimalist setup without trim | Telescoping friction bar with locking hardware | 28–40 in (71–102 cm) | 200–300 lb (91–136 kg) | Paint compression or slipping if the wall is unsuitable |
| Wide or unusual doorway | Adjustable bar with a published opening range | 30–42 in (76–107 cm) | 220–350 lb (100–159 kg) | Insufficient overlap or incompatible trim depth |
Our top picks by design
Best all-rounder: a padded over-the-door multi-grip bar
A model in the style of the Iron Gym Upper Body Workout Bar or ProsourceFit Multi-Grip Bar is usually the most practical option for a standard interior doorway. These bars use the upper door frame or trim as a support point while a lower section presses against the opposite side of the frame. The user’s weight is distributed across several padded contact areas rather than concentrated at one threaded point.
Choose one with at least 2 inches of dense foam or rubber at every contact point, a steel frame, multiple grip positions, and a clearly stated 250 lb or higher capacity. The extra grip positions are useful, but they also change leverage: wide-grip movements can create more twisting force than a controlled neutral-grip pull-up.
This type is not suitable when the trim is loose, very narrow, decorative, or unable to support a hook. Check the manufacturer’s required trim lip and doorway dimensions before ordering.
Best for low visual impact: a removable telescoping friction bar
A friction-mounted bar has no large upper frame bracket and can be removed in seconds. It is appealing for renters and for doorways without substantial trim, but it requires more careful installation. The bar must press against strong, flat surfaces on both sides of the opening, and the locking mechanism must be engaged exactly as instructed.
Use this design only on a structurally sound doorway or wall opening. Do not install it on drywall alone, glass, hollow decorative molding, uneven tile, or a surface with loose paint. A friction bar may leave small circular compression marks even when it does not tear the frame, so placing thin, firm protective pads between the end caps and the surface can help if the manufacturer permits them.
Best for heavier users: a reinforced over-door bar with a high capacity
For a heavier user or frequent training, look for a steel over-door unit rated at least 300 lb, with a wide rear brace, welded joints, and a deep padded support area. The listed capacity is not a target weight; it should exceed your body weight plus the dynamic force created by movement.
For example, a 200 lb user performing controlled repetitions may produce substantially more than 200 lb of force while dropping into a repetition. Kipping, swinging, and weighted pull-ups increase the load further. If you intend to use a dip attachment or resistance bands, follow the specific instructions because accessories can shift the center of gravity and change the load on the frame.
How to check whether your doorway is compatible
- Measure the clear opening. Measure from the inside edge of one side to the inside edge of the other, not from the outside of the trim. Compare this with the bar’s usable width range.
- Measure trim depth and lip. Over-door bars commonly need a protruding upper trim section. A flat opening with no lip may not support the hook design.
- Inspect the material. Solid wood and firmly installed structural trim are preferable. Avoid loose casing, cracked plaster, hollow partitions, and door frames that flex when pushed.
- Check headroom. Add the bar’s height and your own reach. If your knuckles or head will strike the ceiling, choose a lower-grip position or a different opening.
- Inspect both sides. The bar may fit the width but fail because a nearby door, hinge, cabinet, or wall prevents the rear brace from sitting flat.
Installation that minimizes marks and slipping
Start with a clean, dry surface. Dust and grit can become abrasive under rubber pads, while moisture reduces friction. Wipe the pads with a slightly damp cloth and let them dry; avoid oily cleaners and silicone sprays.
- Place the bar in the doorway without loading it and confirm that every pad sits flat.
- Center the bar so the left and right supports carry similar loads.
- Push or tighten the locking mechanism only to the manufacturer’s specified position. Excessive tightening can dent soft trim without meaningfully improving safety.
- Apply a gradual test load by pulling down with your feet still on the floor.
- Perform a partial hang for a few seconds, then inspect the frame, pads, hooks, and locking points.
- Only after the bar remains stable should you attempt a full repetition.
Do not test a new bar with a jump, swing, or kipping motion. A gradual load reveals slipping before the bar receives the peak force of a dynamic movement.
Which features actually protect the frame?
- Wide contact pads: Wider pads reduce pressure per square inch and are less likely to create dents than narrow plastic feet.
- Replaceable padding: Foam eventually compresses, splits, or becomes slick. Replaceable pads extend the life of the bar and reduce direct metal-to-trim contact.
- Rounded hooks: Rounded, padded hooks are less likely to gouge painted casing than sharp steel edges.
- Multiple support points: A bar that contacts the top and both sides of the opening generally distributes force better than a single narrow bracket.
- Positive locking hardware: Telescoping models should have a mechanical lock or safety pin in addition to friction. Friction alone is less reassuring for repeated use.
- Clear compatibility instructions: A trustworthy listing states opening width, trim requirements, surface restrictions, and capacity instead of publishing only a maximum weight.
Frame-safe ownership: what wears first
The foam and rubber usually wear before the steel. Inspect them every few weeks if the bar is used often. Replace padding when it becomes flattened, cracked, sticky, or permanently displaced. Check bolts and welds for movement, and look for paint transfer or fresh dents on the frame.
Remove the bar after each session if the doorway is painted, rented, or exposed to humidity. Leaving an over-door bar installed continuously can keep pressure on the trim and may cause a rectangular mark. Store it where the pads will not be crushed under other equipment.
A useful replacement rule is based on use rather than calendar age. If you train three times per week, that is about 156 sessions per year. A bar costing $35 and lasting two years costs roughly 11 cents per session, before replacement pads. A more expensive $90 bar lasting five years costs about 12 cents per session at the same frequency. The cheaper purchase is not necessarily the lower-cost option if its padding fails quickly or it damages a rental frame.
Common mistakes to avoid
- Using a bar on a doorway narrower or wider than its stated range.
- Assuming a high weight rating makes a weak or flexible frame safe.
- Adding weight before testing the bar with controlled bodyweight repetitions.
- Performing kipping pull-ups on a bar designed only for strict movements.
- Applying oil, wax, or household polish to friction pads.
- Putting thin fabric under a friction pad, which can reduce grip and allow movement.
- Ignoring a creak, sliding sound, bent bracket, or newly compressed trim.
Bottom line
For most standard doorways, choose a padded over-the-door steel bar with a 250–300 lb capacity, broad contact surfaces, rounded hooks, and published trim requirements. Choose a telescoping friction bar only when both sides of the opening are strong, flat, and compatible with its locking system. Whichever design you buy, accurate measurements, gradual testing, clean pads, and regular inspections matter more to frame safety than a long list of grip positions.